XTEN-AV provides advanced AV design solutions to ensure sharp and clear projections in any setup, including ceiling-mounted installations. Many users experience blur when mounting their projector on the ceiling, leading to searches with keywords like why is my projector blurry, projector blurry, my projector is blurry, and how to fix blurry projector. Understanding the causes and solutions is essential for a crisp, professional-quality image.
Why Ceiling Mounts Can Cause Blur
Ceiling mounting introduces specific challenges that can affect image clarity:
1. Incorrect Throw Distance
Mounting the projector higher or farther back than its optimal throw distance can cause the image to go out of focus. Even if you adjust the focus ring, the projector may not be able to compensate fully, resulting in my projector is blurry.
2. Lens Tilt and Angle
Ceiling mounting often requires tilting the projector downward to align with the screen. Excessive tilt can degrade image sharpness, especially if the projector relies on digital keystone correction.
3. Keystone Correction Overuse
To correct the angled projection from a ceiling mount, many users apply keystone correction. While this helps align the image, overusing digital correction can reduce clarity and create edge blur.
4. Lens and Zoom Limitations
Some projectors have lenses with limited focus or zoom range. If the projector is mounted too far from the optimal range, the image may appear soft or blurry.
How to Fix Blur When Ceiling Mounted
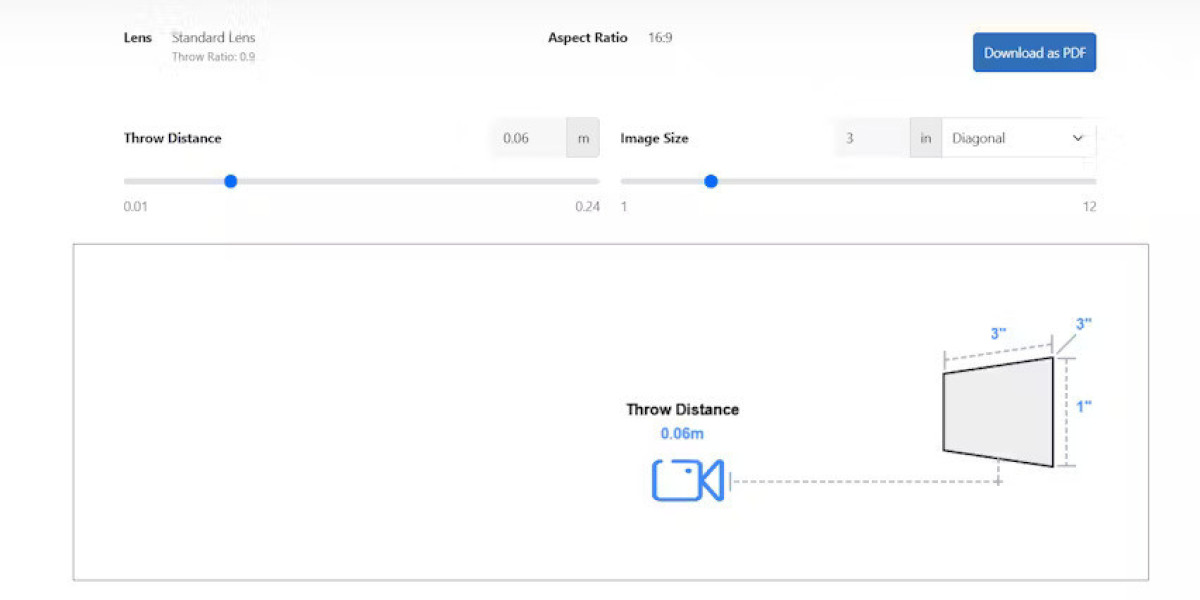
1. Calculate Optimal Mounting Distance
Use your projector’s throw ratio to determine the correct distance from the ceiling mount to the screen:
Ensure that the projector is within the lens’s optimal focus range.
2. Adjust Tilt and Lens Shift
Use physical lens shift or slight adjustments in tilt instead of relying heavily on keystone correction. Proper alignment helps prevent projector blurry edges.
3. Minimize Keystone Correction
Digital keystone correction can degrade image sharpness. Use physical adjustments and proper placement to avoid excessive digital correction.
4. Check Lens and Zoom Capabilities
Ensure your projector lens can handle the ceiling mounting distance. Some setups may require a short-throw or long-throw lens depending on the room size.
5. Use AV Design Tools
Platforms like XTEN-AV allow you to simulate ceiling-mounted projector setups in 3D. You can virtually adjust mounting height, tilt, and distance to ensure the image remains sharp before installation. This prevents how to fix blurry projector issues.
Benefits of Proper Ceiling Mount Planning
Sharp image across the entire screen
Eliminates edge blur caused by tilt and keystone correction
Ensures optimal focus and alignment
Reduces trial-and-error adjustments and installation time
Final Thoughts
Blurry images from ceiling-mounted projectors are often caused by incorrect throw distance, lens limitations, tilt, or overuse of keystone correction. Keywords like why is my projector blurry, projector blurry, and my projector is blurry indicate common frustrations that proper planning can resolve.
By calculating the correct distance, using lens shift, minimizing digital corrections, and leveraging AV design software like XTEN-AV for virtual simulations, you can guarantee a clear, sharp image in any ceiling-mounted setup. This ensures a professional-quality projection for home theaters, classrooms, or conference rooms.
Read more: https://www.geto.space/read-blog/37477